

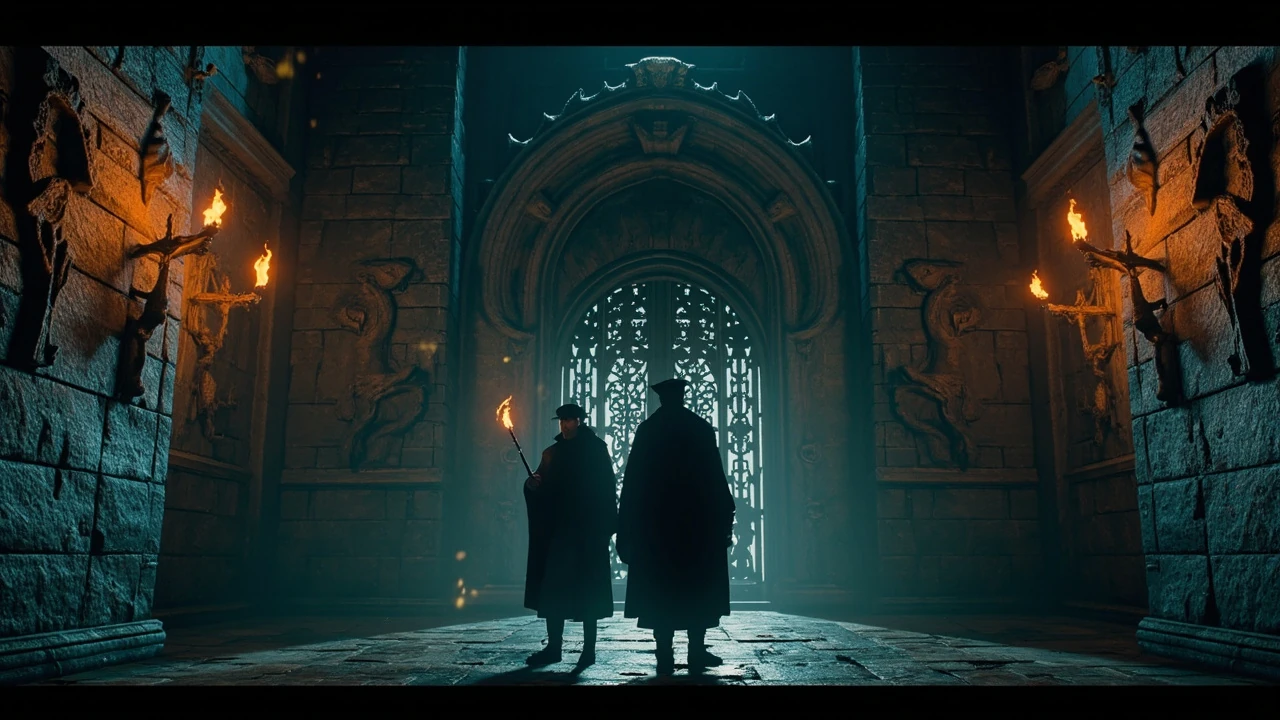
Hogwarts Legacy puzzle doors: what they actually test and how to solve them
A first-time player usually meets a Hogwarts Legacy puzzle door during the early exploration of the castle, walks up to a wall covered in animal emblems, and finds no visible keyhole, handle, or prompt. The door is locked, the two triangular clusters of symbols refuse to behave, and the nearby guide note does not explain the rule. That is intentional. The puzzle door system is one of the few recurring environmental puzzles in the game, and it asks the player to perform a small piece of arithmetic and a small piece of logic before the door will move. Once the mechanic is understood, every puzzle door in the castle, in the Highlands, and inside the Room of Requirement can be solved in seconds.
This guide breaks down exactly what a Hogwarts Legacy puzzle door tests, how the symbol math is read on the wall, and which configurations appear where. It also covers the design context for the doors, the order in which they are usually encountered, and the small set of variations the developers use to keep the puzzle from feeling identical across the entire game. Whether the goal is a chest full of gear, a Field Guide page, or a closed-off shortcut through Hogwarts, the same rule applies on every door.
The design intent behind Hogwarts Legacy puzzle doors
Puzzle doors exist to slow the player down in a very specific way. The castle is enormous, and many of its rooms are gated by a single environmental test that has nothing to do with combat, stealth, or spell timing. The puzzle door is the only puzzle in the core exploration loop that depends purely on observation and arithmetic. It rewards players who actually look at the wall in front of them, and it filters the less attentive by simply not opening.
From a design perspective, the doors are a deliberate counterweight to the game’s combat encounters. Hogwarts Legacy is built on long stretches of fighting, spell-casting, and exploration, and the puzzle doors are a moment where the player’s wand is irrelevant. The designers placed them at meaningful junctions: behind a locked door there is usually a chest, a Field Guide page, a cosmetic item, or a small lore note. The reward is never the puzzle itself; the puzzle is the gate.
The mechanic also doubles as a teaching tool. The first puzzle door appears early enough that a player who learns the rule can carry it forward for the rest of the game. The developers reused the system across multiple regions and used small variations in the symbol layout to keep it from feeling like a single memorized trick. That balance between consistent rule and varied layout is what makes the puzzle door a recurring piece of level design rather than a one-off gimmick.
The two math symbols you need to recognize
Every puzzle door in Hogwarts Legacy is built from the same two pieces of iconography, and the entire solution depends on reading them correctly. The icons are small, but the game never changes what they mean.
- Triangle pointing up. This symbol marks the “top” half of the answer. The door is looking for the count of a specific animal in the upper group of symbols.
- Triangle pointing down. This symbol marks the “bottom” half of the answer. The door is looking for the count of a different animal in the lower group of symbols.
These two triangles are the only arithmetic operators on the door. A player who knows which animal is “top” and which is “bottom” can read the rest of the wall. The two numbers, added together, must equal the number shown on the central plaque, which is the door’s target total. The plaque always shows a number written in the same style as the rest of the game’s rune-like markings.
The full rule reads: find the animal whose symbol appears in the up-triangle group, count how many of that animal are in the top row, then find the animal whose symbol appears in the down-triangle group, count how many of that animal are in the bottom row, and make the two counts add up to the number on the plaque. When the two counts match the plaque number, the door opens.
How the symbols are arranged on the wall
Each puzzle door has a small group of carved animal emblems and a single numerical plaque. The emblems are split into two visual clusters. The upper cluster sits above the central plaque, and the lower cluster sits below it. The two clusters share the same wall but are clearly separated by the plaque itself. The triangles on the plaque point to the cluster whose animal needs to be counted.
A typical wall might show a unicorn, a griffin, and an owl in the top cluster, then a snake, a badger, and a second owl in the bottom cluster, with a central plaque that shows a number and the two triangle markers. The two triangle markers always correspond to two of the animals on the wall, one above and one below. The two animals indicated by the triangles are the ones whose counts matter. The rest of the animals are decoration; they have no effect on the solution.
The plaques always use the same triangular icons regardless of which animals the door is testing. The icons do not change meaning between doors, the animals do not change meaning between doors, and the arithmetic is always addition. There is no multiplication, no subtraction, and no hidden sequence. A player who learns the rule on the first door can read every other door correctly without guessing.
Reading the two animal groups
Once the triangles identify which animals to count, the next step is the actual count. The top cluster can hold up to nine of the indicated animal, and the bottom cluster can also hold up to nine. The plaque’s number is always a small integer between 2 and 18, and the two counts that produce it always fall within that range. There is no negative number, no zero-only answer, and no case where the door can be opened without at least one of the two clusters having more than one of its indicated animal.
The two counts must add up to the plaque number exactly. A sum that is one too high or one too low will not open the door, and the game gives no on-screen feedback other than the door simply not opening. Most players solve this by counting aloud, by tapping each symbol with a wand cast, or by stepping back until the wall is in clear view. The emblems are large enough to count at a glance once the player knows which two animals matter.
For players who want a faster method, the two triangles are placed directly above the plaque, and the plaques are tall enough to be read from several feet away. Counting the relevant animals becomes a matter of looking at one row, then the other, and adding the two numbers in the head. A small minority of doors include a third animal that appears in both clusters; in those cases, the count includes both copies, because the puzzle only cares about the indicated animal, not about the cluster as a whole.
Step-by-step method to solve any puzzle door
Once the rule is internalized, the actual solve is a short loop. The following sequence works on every puzzle door in the game, from the earliest castle tutorial to the late Highlands doors.
- Stand directly in front of the door so the entire wall and the central plaque are visible at once.
- Look at the central plaque and identify the up-pointing triangle. Note the animal shown next to it; this is the “top” animal.
- Look at the down-pointing triangle on the same plaque. Note the animal shown next to it; this is the “bottom” animal.
- Count the number of “top” animals in the upper cluster of the wall and remember that number.
- Count the number of “bottom” animals in the lower cluster of the wall and remember that number.
- Read the number on the central plaque and confirm that the two counts add up to it.
- If the two counts do not add up to the plaque number, recheck which animal is “top” and which is “bottom,” then recount.
Players who solve a door correctly will hear a small sound cue, the door’s rune lines will pulse, and the door will swing open on its own. There is no spell to cast, no lock to pick, and no item to consume. The door opens by virtue of the puzzle being solved correctly.
The five animals and what they mean
Hogwarts Legacy uses the same five animals on every puzzle door, and the same five animals are used for the in-game House system. This shared iconography is intentional; the puzzle door is a small piece of world-building as well as a puzzle. The five animals are:
- Unicorn. Often associated with the upper or “ideal” cluster, but the door does not assign a fixed meaning. The unicorn is just another animal to count.
- Griffin. Used in the same way as the unicorn, with no fixed role other than being a possible target animal on the plaque.
- Owl. Appears in both clusters and is the most common target animal on early-game doors.
- Snake. Often paired with a numeric indicator that points down, but the door does not encode a House allegiance. The snake is just a count target.
- Badger. Used symmetrically to the snake and the owl. The badger is purely a count target.
The animals are part of the wider Hogwarts iconography, and they appear on banners, in the Great Hall, and on House-specific robes. The puzzle door does not require any knowledge of the Houses, the founders, or the in-game lore to be solved. The animals are only meaningful as countable symbols.
Where puzzle doors appear in the game
Puzzle doors are scattered through the entire game world, but they cluster in a small number of locations. Knowing where they appear helps the player plan exploration routes and decide which doors to prioritize. The doors are not random; each one is placed near a piece of useful loot or a piece of optional lore.
| Region | Typical door count | Likely reward | Skill requirement |
|---|---|---|---|
| Hogwarts castle interior | 8 to 12 | Field Guide pages, small chests, cosmetic items | None; reachable from the start |
| Hogsmeade and surrounding valley | 2 to 4 | Conjuration recipes, gear caches | None; reachable from the start |
| Highlands, north region | 3 to 5 | Trait items, upgrade materials | Often requires a broom or a mount |
| Highlands, south region | 2 to 3 | Gear caches, lore notes | Often requires a main quest to be active |
| Room of Requirement | 1 (endgame) | Unique cosmetic set | Requires the relevant main quest to be complete |
The exact count per region varies by play style and which side content the player has completed, because some puzzle doors sit behind optional objectives. The above table reflects what most players encounter on a single playthrough with the standard mix of main and side content.
The first puzzle door in the main story
The first puzzle door most players see is part of the introductory castle exploration. It is placed on a route the player must walk past during an early quest, and it leads to a small side room that contains a Field Guide page. The door uses an owl in the top cluster and a badger in the bottom cluster, with a plaque number that is small enough to be solved without paper. The door is teaching the rule rather than testing it.
By the time the player finishes the introductory quest, they will have seen at least one more puzzle door in a different wing of the castle. The developers use the first set of doors to make sure the rule is internalized. After that, the doors become a familiar piece of the world rather than a recurring puzzle. A player who has solved three doors in a row will recognize the rule on the next one without having to re-read the plaque.
This pacing is one of the better pieces of tutorial design in the game. The puzzle door is a low-stakes, low-reward test that is taught through exposure rather than a long on-screen prompt. The same rule carries through to the most remote puzzle door in the Highlands, and the player’s first experience with the mechanic is what enables every later solve.
Variations and edge cases in the puzzle door system
Although the core rule is constant, the developers use a small number of variations to keep the puzzle door from feeling identical. The variations never change the arithmetic, but they change the visual presentation, the cluster sizes, and the way the player is meant to interact with the door.
- Large cluster variation. Some doors in the Highlands use a much larger upper cluster, with the indicated animal appearing in greater numbers. The plaque number scales up to match, and the door tests whether the player can keep count at a glance.
- Repeating animal variation. A small number of doors place the indicated animal in both the upper and the lower cluster. The two counts must still add to the plaque number, and the player must count both occurrences rather than assuming the animal is only in one place.
- Hidden plaque variation. A few doors have the plaque partially obscured by the wall’s stonework or by lighting. The plaque is always readable if the player moves closer or uses a light spell. There is no puzzle door where the plaque is genuinely unreadable.
- Corridor variation. Some doors are placed in narrow corridors where the upper and lower clusters are stacked vertically rather than horizontally. The arithmetic is identical, but the visual layout is rotated.
None of these variations change the underlying rule. They are presentational differences, and the same step-by-step method works on all of them. A player who learns the rule on the first door and is willing to move around the wall to read the plaque will solve every variation without extra help.
Why some players get stuck on the same door
The most common reason a player gets stuck is that the two triangles are mistaken for one another. The up-pointing triangle and the down-pointing triangle are visually similar, and on a small plaque they can be read in the wrong order. A player who counts the wrong animal for the wrong cluster will get a sum that does not match the plaque number, and the door will stay shut. The fix is to read the plaque deliberately and to mark which animal is “top” and which is “bottom” before counting.
The second most common reason is miscount. The emblems are carved into the wall and are sometimes partially obscured by torchlight or by the player’s own shadow. Moving closer, casting a light spell, or stepping back to take in the whole wall usually resolves the count. The door is never unsolvable; it is always a count that does not match the plaque number, and a fresh look at the wall almost always produces a different count.
The third most common reason is a different problem entirely: the door is not a puzzle door at all. A small number of locked doors in the game require a specific key, a specific spell, or a specific quest progress. These doors do not have the two-triangle plaque and do not respond to the puzzle door rule. A door that does not show a number on a central plaque is a different kind of lock and is solved through the game’s quest system rather than through the puzzle door arithmetic.
The connection to the wider Hogwarts world
The puzzle doors are part of a broader piece of environmental storytelling. The castle’s founders, the four Houses, and the school itself are all built on a small set of symbols, and the puzzle door is the only place where the player is asked to use those symbols actively. The puzzle is not about the lore; the lore is a backdrop that makes the puzzle feel rooted in the world.
Players who pay attention to the doors will notice that the animals and the rune-like plaque are the same visual language used on banners, on House robes, and on the in-game UI for the House selection screen. That shared iconography is a deliberate piece of world-building. The doors are not just gates; they are a small piece of the visual identity of the castle.
For a more complete picture of how the game’s wider systems are designed, including the way the developers used environment as a teaching tool, the Hogwarts Legacy page on Wikipedia gives a useful overview of the game’s design, reception, and place in the wider series. The puzzle door system is one small piece of a much larger environmental design, and the Wikipedia article places that piece in the context of the full game.
Practical tips for speed-solving puzzle doors
For players who want to clear puzzle doors quickly without losing time on a single plaque, a few habits make the difference between a five-second solve and a minute of staring at the wall.
- Read the plaque first. Identify the two triangles, and assign the two animals before looking at the clusters. This is the step that prevents miscounts.
- Count the smaller cluster first. Whichever of the two clusters has fewer emblems is faster to count, and the larger cluster’s count is then derived from the plaque number rather than recounted.
- Step back. Most miscounts come from being too close to the wall. Stepping back until the entire cluster is in view removes the parallax distortion that makes emblems at the edges look like duplicates.
- Skip the doors with no plaque. Doors without a numerical plaque are not puzzle doors, and they are not solved by this method. A quick glance at the plaque is enough to know whether the door is in the puzzle door set or in a different lock set.
- Use the in-game map markers. The map does not mark puzzle doors by default, but the Field Guide will list the door if the player has approached it once. Approaching a door and then looking at the Field Guide gives a reliable reference list of which doors are still unsolved.
None of these tips change the rule. They change the speed at which the rule is applied, and they make the puzzle door a five-second interaction rather than a recurring interruption.
Comparison: puzzle doors versus other environmental puzzles in the game
Hogwarts Legacy uses a small set of environmental puzzles, and the puzzle door is only one of them. Each puzzle system has a different rule and a different reward, and a player who confuses them will end up standing in front of the wrong kind of lock.
| Puzzle type | Visual cue | Rule | Where it appears |
|---|---|---|---|
| Puzzle door | Two-triangle plaque plus animal emblems | Add two animal counts to match a plaque number | Castle, Hogsmeade, Highlands, Room of Requirement |
| Statue block puzzle | A movable block on a pressure plate or a switch | Move the block to a target position | Various side dungeons and ruins |
| Light and shadow puzzle | A moving light source aimed at a target | Redirect the light beam to the receptor | Specific ruins and a small set of castle rooms |
| Butterfly cage | A glass case with a flying butterfly inside | Match a sequence on a nearby plaque to the butterfly’s path | Mostly inside the castle and a few Highlands houses |
Players who learn the difference between these puzzle systems save themselves a lot of trial and error. The puzzle door is the only one that uses a numerical plaque, and it is the only one that depends on counting animals. A door that does not have a plaque is almost certainly a different kind of lock.
Common misconceptions about puzzle doors
A few misconceptions about puzzle doors come up often enough that they deserve to be addressed directly. None of them are part of the actual rule, but they can mislead a player who has only seen a small number of doors.
- The numbers represent a House. The plaque number is a count, not a House identifier. The four House mascots are part of the wider iconography, but the plaque number has no allegiance and no lore meaning.
- The animals must be counted in a specific order. The order of the animals in the cluster does not matter. Only the count of the indicated animal matters.
- The two triangles are part of a hidden sequence. The triangles always point to the cluster whose animal needs to be counted. There is no sequence, no code, and no hidden message beyond that.
- Some doors can be opened with a specific spell. Puzzle doors do not respond to any spell. The only input is the player’s correct reading of the wall.
- The door is timed. There is no timer on a puzzle door. The player can stand in front of it indefinitely without any penalty.
These misconceptions come from the wider Hogwarts iconography and from players who try to extend the lore into the puzzle system. The puzzle is a piece of environmental design, not a piece of narrative design, and the lore is decoration rather than a clue.
What the rewards tell us about the design
The rewards behind puzzle doors are deliberately calibrated. A puzzle door almost never guards a piece of gear that is essential to the main story, and it almost never guards a quest-critical item. The reward is usually a Field Guide page, a cosmetic item, a small piece of gear that is useful but not unique, or a piece of lore. This calibration is what lets the puzzle door be a slow, observational test rather than a high-pressure test.
The same reward profile is used across the entire game for the entire puzzle door set. A player who has solved every puzzle door in the castle will have a few extra pieces of gear, a more complete Field Guide, and a small set of cosmetic items. They will not have skipped any required content, and they will not have missed any main quest. The puzzle door is a layer on top of the main game, not a part of the main game.
This is one of the more successful pieces of pacing in the game. The combat encounters are the main loop, and the puzzle doors are a side loop that gives the player a moment of quiet observation. The fact that the reward is small keeps the side loop from competing with the main loop, and the fact that the rule is simple keeps the side loop from becoming a wall.
How puzzle doors compare to similar systems in other games
The puzzle door is a familiar piece of design. Other open-world games have used the same idea, usually with a different visual language and a different rule. The reason the puzzle door works in Hogwarts Legacy is that the rule is constant, the visual language is consistent with the wider world, and the reward is calibrated to the rule’s difficulty. A puzzle system that changes its rule on every door is harder to teach and harder to remember; a puzzle system that uses the same rule with different layouts is easier to teach and easier to remember.
The system also benefits from being placed in a world that is dense with visual information. The castle is full of banners, suits of armor, moving staircases, and portraits. A puzzle door has to compete for attention with all of those visual elements, and the developers solved that by making the puzzle door the only wall in the game with a numerical plaque. The plaque is the cue, and the cue is unambiguous.
For players who are interested in the broader cultural context of the game’s release, the 2020 Verge report on the franchise’s creative direction gives a useful starting point. The puzzle door itself is a small piece of design, but it sits inside a larger cultural conversation that the article outlines.
A quick reference for the math behind every puzzle door
Players who want a single reference they can keep on screen while exploring can use the following summary. It is the same rule as the rest of the article, condensed into one block.
- What to find: the up-triangle animal and the down-triangle animal on the central plaque.
- What to count: the number of up-triangle animals in the upper cluster and the number of down-triangle animals in the lower cluster.
- What to match: the sum of the two counts must equal the number on the plaque.
- What to do if it does not match: recount, and confirm the two triangles are read in the right order.
- What to do if the door does not have a plaque: it is a different kind of lock and is not solved by this method.
That block is the entire puzzle. There is no hidden rule, no secret sequence, and no special case. Every puzzle door in the game is solved by reading the plaque, counting the two animals, and matching the sum.
How the puzzle door fits into a complete playthrough
On a standard playthrough, the player will solve somewhere between fifteen and twenty-five puzzle doors, depending on how much optional content is completed. The first door is part of the early castle exploration, and the last door is part of the endgame content in the Room of Requirement. Between those two points, the doors are scattered through the castle, through Hogsmeade, and through the Highlands.
A player who wants to clear every door should plan to revisit the castle multiple times. Several puzzle doors are only reachable after a specific spell or a specific quest is complete, and the player will return to the castle at multiple points in the main story. A single visit rarely covers every door, and a quick back-and-forth through the castle wings is usually enough to catch the ones that were missed on a first pass.
For players who want to pair this with broader guidance on the game’s open-world design, the practical workflow used by most studios when planning optional content, including how reward density is balanced against exploration time, is covered in more detail in our guide to partnering with video game outsourcing companies. Puzzle doors are one small example of how reward density is tuned in a large open-world game.
What to do if a puzzle door is genuinely blocked
A small number of puzzle doors in the game are blocked by a physical obstacle that has nothing to do with the puzzle itself. A door might be behind a movable statue, behind a locked side door, or behind a quest gate that has not been opened yet. In those cases, the puzzle door’s plaque is still readable, but the player cannot reach the door to open it.
The right move in those cases is to come back later. The obstacle is usually tied to a main quest, a side quest, or a specific spell that the player does not have yet. Once the obstacle is cleared, the puzzle door is solvable through the same rule as every other door. There is no door in the game that is permanently blocked by a non-quest obstacle, and there is no door that requires an item the player cannot obtain.
Players who find themselves standing in front of an unreachable puzzle door should look at the wider context. If a side quest in the area is incomplete, finishing it usually opens the route. If a main quest is at a particular stage, finishing the relevant chapter usually clears the obstacle. The puzzle door is rarely the actual blocker; the obstacle behind the door is the blocker.
A short list of the puzzle doors most players miss
On a standard first playthrough, a small number of puzzle doors are usually missed because they are tucked into a side corridor or behind a quest gate. The following list is the set of doors that most players report as missed on a first run, with a note on why each is missed.
- The Astronomy Wing door. Often missed because the side corridor is easy to walk past during a main quest. The door is solvable from the start.
- The Bell Tower Wing door. Often missed because the relevant corridor is only accessible after a specific main quest. The door is solvable from that point onward.
- The Library Annex door. Often missed because the room it leads to is partially out of the player’s line of sight. The door is solvable from the start.
- The South Hogsmeade door. Often missed because it is on a side path that is not on the main route to most of the valley’s content. The door is solvable from the start.
- The Room of Requirement door. Often missed because it only appears after the relevant main quest is complete. The door is solvable at that point.
None of these missed doors is hard to solve once the player reaches them. They are missed because of placement rather than because of the puzzle itself, and a quick back-and-forth through the relevant wing usually catches the ones that were missed on a first pass.
Frequently asked questions
What is the rule for Hogwarts Legacy puzzle doors?
The central plaque on a Hogwarts Legacy puzzle door shows two triangles, one pointing up and one pointing down. Each triangle points to a specific animal. Count the number of “up” animals in the upper cluster, count the number of “down” animals in the lower cluster, and add the two counts together. The sum must equal the number on the plaque. When the two counts match the plaque number, the door opens.
Do the five Hogwarts Legacy puzzle door animals mean anything?
The five animals (unicorn, griffin, owl, snake, badger) are part of the wider Hogwarts iconography and are used in the House system. On a puzzle door, the animals have no House meaning. They are pure count targets, and the door does not encode any House allegiance. A player who treats the animals as House symbols will misread the door.
What happens if I count the wrong animal on a puzzle door?
The door stays shut. There is no penalty, no sound cue, and no on-screen feedback. The player can stand in front of the door indefinitely, recount, and try again. The door opens only when the two correct counts add up to the plaque number.
Can a spell open a Hogwarts Legacy puzzle door?
No. Puzzle doors do not respond to any spell. The only input is the correct reading of the wall. Doors that do respond to a spell are a different kind of lock and are not part of the puzzle door set.
Are puzzle doors the same in every region?
The rule is the same in every region, from the earliest castle doors to the endgame doors in the Room of Requirement. The visual layout changes slightly between regions, with larger clusters in the Highlands and a vertical layout in some narrow castle corridors, but the arithmetic is identical on every door.
Do I need to solve every puzzle door to finish the game?
No. The rewards behind puzzle doors are Field Guide pages, small gear caches, cosmetic items, and lore notes. None of them is required for the main story, and none of them is required for any trophy or achievement related to the main quest. A player can finish the main story with zero puzzle doors solved.
Why does the door have two triangles instead of one?
The two triangles split the puzzle into two halves. The up-pointing triangle identifies the animal to count in the upper cluster, and the down-pointing triangle identifies the animal to count in the lower cluster. A door with only one triangle would have only one cluster, and the puzzle would be a single count rather than a sum.
Can the same animal appear in both clusters?
Yes. A small number of puzzle doors place the indicated animal in both the upper and the lower cluster. The two counts must still add up to the plaque number, and both occurrences are counted. This variation is part of the design and is not a bug.
What is the highest number that can appear on a puzzle door plaque?
The plaque number is always a small integer that fits the two cluster sizes. In practice, the plaque number is between 2 and 18, and the two counts that produce it never exceed the number of emblems on the wall. There is no puzzle door with a plaque number that is unreachable from the wall’s count.
Are puzzle doors available in the Room of Requirement?
Yes. There is at least one puzzle door in the Room of Requirement, and it is part of the endgame content. The door uses the same rule as every other puzzle door, and the reward is a unique cosmetic set. The door is only reachable after the relevant main quest is complete.



Leave a Reply