

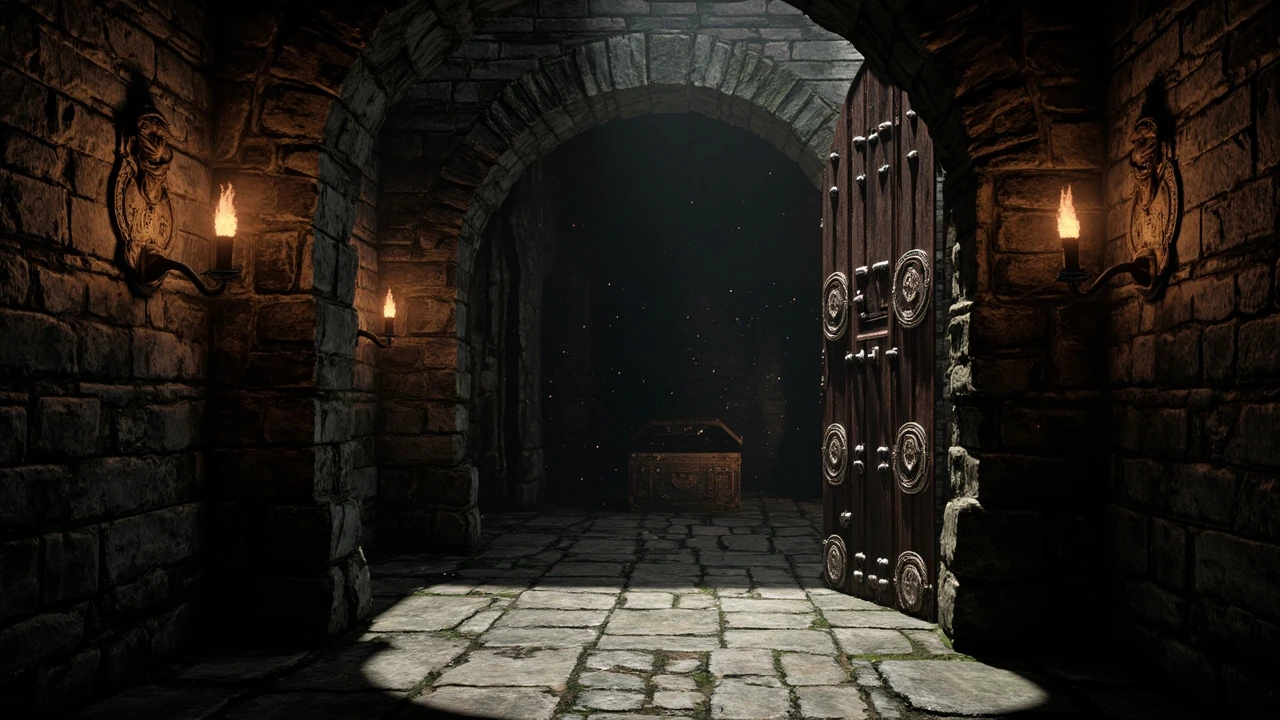
Hogwarts Legacy door puzzle
Walking up to a brass-studded door in Hogwarts Legacy and seeing a triangle of animal symbols staring back is one of the more disorienting moments in the game. The arithmancy doors look like they require a story-specific key, but they are actually a small math puzzle: the animals around the frame represent numbers, and the triangles on the door ask you to make those numbers add up. Once that mental model clicks, the rest of the mechanic is just counting and turning dials.
For developers and technical players, the puzzle is also a clean example of how a single design system can be reused across many encounters without copy-paste scripting. One set of symbols, one rule, and a handful of integer targets generates dozens of unique doors. This article walks through how the Hogwarts Legacy door puzzle actually works, how to solve it on the first try, what the optional cipher page adds, and the design lessons worth borrowing for any project that wants environmental puzzles to feel rewarding rather than arbitrary.
What the Hogwarts Legacy door puzzle actually is
The arithmancy doors are a self-contained puzzle type that appears throughout the castle, the Highlands, and Hogsmeade. Each door has the same structure: a row of bronze animal medallions along the outer frame, and a pair of triangles etched into the wood with numbers and unknown symbols. Solve the triangles and the door unlocks, revealing a small room with a chest and usually one or more gear slots.
Mechanically, the puzzle is built on three layers that the player has to discover in the right order:
- A symbol-to-number mapping defined by the animals around the frame.
- An addition rule that links the outer triangle values to the center value.
- A dial interface that lets the player set the unknowns to the values they calculated.
None of the steps require a quest, a level requirement, or a key item. The only thing standing between the player and the loot is a short piece of arithmetic. That decision, removing progression gates from a puzzle, is a deliberate design choice worth noting: it means the doors can be scattered liberally through the world without breaking a quest chain, which is exactly the kind of placement the rest of the game relies on.
How the creature symbols map to numbers
The animal medallions around the door are the key to the whole system. Each one represents a number from 0 to 9, and the mapping is the same on every door. Players do not need a key item or a side quest to learn it, although a note found in the world spells the mapping out explicitly. The unofficial but consistent convention, as documented in a detailed GamesRadar walkthrough of the Hogwarts Legacy door puzzle, is that the animals correspond to their number of limbs or appendages, starting from 0 on the left of the door and counting clockwise around the frame.
Most animals line up neatly with that rule, which is why the system feels intuitive once a player notices it:
- 0: a one-eyed creature or worm-like shape with no limbs.
- 1: a spider at the start of the count, or a creature with one prominent appendage.
- 2 through 5: standard beasts that match the leg or limb count expected.
- 6 and 7: the points where the limb-count rule stops being obvious, so the cipher page is genuinely useful here.
- 8 and 9: the highest values on the door, usually represented by creatures with more elaborate body parts.
Because the count starts at 0 and goes left-to-right around the frame, the player can always derive a symbol’s value by position, even without recognising the animal. That is the part of the design that makes the puzzle solvable in the field: positional knowledge is enough, even when species knowledge is not.
Reading the triangle sums on the door
Once the player knows the animal-to-number mapping, the next step is reading the puzzle on the door. Interacting with the door reveals two triangles. Each triangle has a number or animal symbol at each of its three corners and a target value in the center. Some corners are already filled in with a number, others show the question mark and animal icon that indicate the value the player has to determine.
The rule the triangles encode is straightforward addition. The three outer values must add up to the center value. So a triangle showing 2, ?, and a known creature in the center with a value of 6 means the unknown corner needs to be 4, and the player has to turn the dial to the animal medallion that represents 4. The same logic applies in reverse for the second triangle, and the door only opens when both triangles are satisfied at the same time.
The interface usually expresses the unknowns as single or double question marks rather than fully blank slots, which is a deliberate UI hint. A single question mark means the value is 0-4, and a double question mark means the value is 5-9. That small piece of feedback cuts the search space in half on each dial, and it is one of the better usability touches in the whole system.
Step-by-step: solving a door from a cold start
Even with the rule in mind, the first door a player encounters can feel opaque. A repeatable procedure helps.
- Walk up to the door and identify the animal medallions on the frame. Count them from left to right, starting at 0, and write down the number each visible animal represents.
- Interact with the door to bring up the two triangles. Read the center values first, since those are the targets you need to hit.
- For each triangle, note which corners are already filled with a number. Add the known corners together.
- Subtract the sum of the known corners from the center value. The result is the value you need to set on the unknown corner or corners.
- Match that value back to the animal medallion on the door frame. Turn the dial until that animal sits in the unknown slot.
- Repeat for the second triangle. When both triangles are satisfied, the door opens.
If the dial click does not register, the most common cause is a small frame-rate hitch when the puzzle first opens. Letting the camera settle and re-clicking the dial usually fixes it, and the puzzle state does not reset.
The optional cipher page and what it adds
Somewhere in the world there is a piece of paper that explains the animal-to-number mapping in writing. The note is not required to solve the doors, and the game never flags it as a quest objective, which is why many players never find it. Its real role is to confirm what observant players have already inferred from the door frames, and to resolve the confusing 6 and 7 values where the limb-count rule breaks down.
For developers, the cipher page is an interesting case study in optional guidance. The puzzle is fully solvable without it, so the document functions as a confidence check rather than a key. Players who hit a wall can read the note, see the explicit mapping, and feel that the game has acknowledged their effort. Players who never read it get a small revelation of their own when they realise the system is consistent. Both outcomes are positive, and that is the design win.
Where arithmancy doors appear and what they gate
Arithmancy doors are not tied to a specific quest, but they are tied to the gear upgrade system. Behind almost every door is a chest, and many of those chests contain gear, which is the resource used to upgrade weapons and clothing. A few doors also reveal collectible cosmetics or crafting materials. Because gear upgrades are one of the main vertical progression systems in the late game, hunting doors is a reasonable use of travel time even if the player does not need the chest contents immediately.
The doors also function as landmarks. They tend to sit at the end of side corridors, behind illusory walls, or near rooftops that are otherwise hard to navigate to. Solving one is often the fastest way to confirm that a hidden path is worth exploring, which makes the puzzle a soft navigation aid on top of a loot gate.
Common mistakes when solving the doors
Most failed attempts come down to a handful of predictable errors. A short troubleshooting list saves a lot of trial and error:
- Starting the count at 1 instead of 0. The first medallion on the left is always 0, not 1. This single mistake is responsible for most “impossible” doors.
- Counting the wrong direction. The mapping goes left to right around the frame, not top to bottom. A door read from the wrong side will look one number off on every symbol.
- Confusing the two triangles. Each triangle is solved independently, and players occasionally try to combine values across the two shapes. They are not connected.
- Ignoring the question-mark count. A single question mark is 0-4 and a double question mark is 5-9. The dial will let you turn to any animal, so the hint is the only way to avoid brute force.
- Forgetting that the door does not need Alohomora. The arithmancy doors are a separate system from the lockpicking doors, and they are always at the same difficulty regardless of the player’s lock level.
Any one of these is enough to derail a solve. Most players only hit one of them per door, and after two or three solves the muscle memory is in place.
How the arithmancy system compares with other puzzle types in the game
Hogwarts Legacy uses several environmental puzzle families, and the arithmancy door sits in a specific niche among them. A quick comparison clarifies where the door puzzle earns its design budget and where other puzzle types carry more weight.
| Puzzle type | Core rule | Tools required | Time to first solve | Reward profile |
|---|---|---|---|---|
| Arithmancy door | Animal symbols map to numbers, triangle sums must add up. | None. | Low after one solved example. | Gear chest, sometimes cosmetics or crafting materials. |
| Alohomora lock | Mini-game timing on rotating tumblers. | Unlocked via the Alohomora quest, level scaling by player progression. | Low, gated by quest progress. | Loot, sometimes a side area or shortcut. |
| Merlin Trial | Set-piece environmental puzzle with platforming or object placement. | Basic spells, often broom flight for the larger arenas. | Medium, varies per trial. | One row of the Field Guide page, plus a unique cosmetic. |
| Statue block puzzles | Move heavy blocks onto pressure plates in a specific arrangement. | Wingardium Leviosa and basic exploration. | Low to medium. | Cosmetic gear, sometimes a fast travel point. |
| Depulso puzzle rooms | Use Accio and Depulso to swing heavy objects through obstacles. | Specific spell learned in the main story. | Low once the spell is acquired. | Gear chest, occasionally a collectible. |
What stands out from that comparison is that the arithmancy door is the only one of the five that has no progression gate. A level 1 character with no spells beyond the starter set can solve every arithmancy door in the game. That decision lets the developers place the doors as world-building dressing without worrying about locking a quest behind content the player has not reached yet.
Under the hood: how a system like this is usually built
From a game development perspective, the arithmancy door is a small, well-scoped example of a content-driven puzzle system. The implementation usually follows a familiar pattern, and the same shape is reusable in any project that wants environmental puzzles to feel authored rather than random.
| System layer | What it does | Why it matters for designers |
|---|---|---|
| Symbol library | A shared asset set of animal meshes plus a numeric index for each. | Adding a new animal later changes every door without touching individual level data. |
| Frame data | Per-door list of which symbol occupies each medallion slot, plus the count direction. | Lets level designers place animals arbitrarily while keeping the puzzle solvable. |
| Puzzle definition | Per-door specification of the two triangle centers, the known corners, and the unknown corners. | Encodes the answer key in data, so QA can validate doors without playing the puzzle. |
| Solver | Runtime function that, given the symbol library and the puzzle definition, computes the required dial positions. | Separates authoring from validation, which makes community modding safer. |
Two implementation details tend to decide whether a system like this feels fair. First, the symbol-to-number mapping should be derivable from world geometry rather than stored in a hidden lookup table; that is what lets the positional count work. Second, the puzzle definition should support a one- or two-line check that confirms the arithmetic is solvable with the symbols actually placed on the door. Without that check, a designer can author a triangle that the player can never satisfy, and that failure is much more frustrating in the field than on a test pass.
Reusing the design pattern in other projects
The Hogwarts Legacy door puzzle is a useful reference for any developer building environmental puzzles that need to scale across a large world. A short list of takeaways is worth more than a long discussion.
- Keep the rule count low. One mapping plus one arithmetic rule is enough to generate dozens of doors without feeling repetitive.
- Make the rule derivable from the environment. The positional count is what saves the player when they cannot remember the cipher page.
- Reduce the search space with small UI hints. The single and double question marks are a good example of feedback that is honest about the constraint without solving the puzzle for the player.
- Author the answer in data, not in the level. Puzzle definitions should be inspectable, so QA and future designers can verify a door without playing it.
- Reward the player with something useful but not essential. Gear chests behind the doors give the puzzle a reason to exist without making it a progression blocker.
None of these rules are unique to Hogwarts Legacy, but the game combines them in a way that is unusually clean. The puzzle never asks the player to look up a guide to make progress, but it is happy to be looked up if the player wants confirmation. That balance is what makes the mechanic feel respectful of the player’s time.
What to do if a door refuses to open
Even with the rule in mind, a small number of doors seem to resist solution. The cause is almost always a wrong mapping assumption rather than a bug, and a quick diagnostic pass is usually enough to clear it.
- Reset the puzzle by walking away and returning. This reloads the door state without losing your place in the world.
- Re-count the medallions starting from the leftmost animal. Confirm the count starts at 0 and goes left to right around the frame.
- Read the center value again. It is easy to misread a 6 as a 9 or a 3 as an 8, and that one error throws the whole triangle off.
- Check both triangles independently. The two puzzles are not linked, so each one has to add up on its own.
- If the dial will not turn to the animal you want, the animal may not be present on the frame. Some doors only have a subset of the ten symbols, which is a strong hint that the puzzle expects a smaller set of answers.
If none of these steps resolves the door, the next most useful action is to leave the area, fast travel to a known door, and solve it as a sanity check. Confirming that the system still works in a familiar location usually tells the player whether the problem is the specific door or the player’s mental model. From there, the fix is either a recount of the frame or a careful re-read of the center values.
Frequently asked questions
Do you need a specific spell to open the arithmancy doors?
No. The Hogwarts Legacy door puzzle is independent of Alohomora and any other lockpick-style spell. The doors are a separate puzzle system that only requires the player to know the animal-to-number mapping and the addition rule.
Where is the cipher page that explains the animal numbers?
The cipher page is a note found in a specific location in the world. The game never marks it on the map and never points the player toward it, which is why many players never see it. It is not required to solve any door, but it is useful for the values where the limb-count rule is ambiguous, particularly 6 and 7.
What do the single and double question marks on the door mean?
A single question mark means the unknown value is between 0 and 4, and a double question mark means the value is between 5 and 9. The dials will accept any animal, so the question-mark count is the only UI hint about which half of the mapping to look at.
Do the door puzzles scale with character level?
No. The arithmancy doors are a static puzzle system, and every door uses the same mapping and the same addition rule. Character level, gear, and spell progression do not change how the puzzle is solved, which is why the doors are accessible from the start of the game.
What is behind most of the arithmancy doors?
Almost every door hides a chest that contains gear, which is the main resource for upgrading weapons and clothing. Some chests also hold cosmetics or crafting materials, and a small number of rooms include an extra collectible. The doors do not gate quest progress, so missing one is never a story blocker.
Is the order of the animals on the frame the same on every door?
No. Each door has its own arrangement of animal medallions, which is part of what makes the system feel authored rather than copy-pasted. The count always starts at 0 on the leftmost medallion and goes left to right around the frame, but the specific animal at each number is different from door to door.
Can the arithmancy door puzzle be modded or extended?
Modders usually extend the system by adding new animals to the symbol library and new puzzle definitions to the door data, rather than rewriting the solver. Keeping the symbol-to-number mapping and the addition rule stable is what makes the system safe to expand without breaking existing doors.
Why do some doors seem impossible to solve on the first try?
The most common reason is starting the count at 1 instead of 0. The leftmost medallion is always 0, and the rest of the symbols follow from there. Once the player recalibrates to start at 0, almost every “impossible” door becomes a one-step solve.
Are the arithmancy doors connected to the main story?
No. The doors are a self-contained side activity. Solving them does not advance any quest, but it does give the player a steady supply of gear, which is useful for the harder story encounters in the late game.
What is the fastest way to learn the system for new players?
The fastest path is to find the first arithmancy door, solve it using the positional count, and then immediately look for a second door nearby. Two solves is usually enough to internalise the mapping, and from there the rest of the doors are routine.




Leave a Reply