

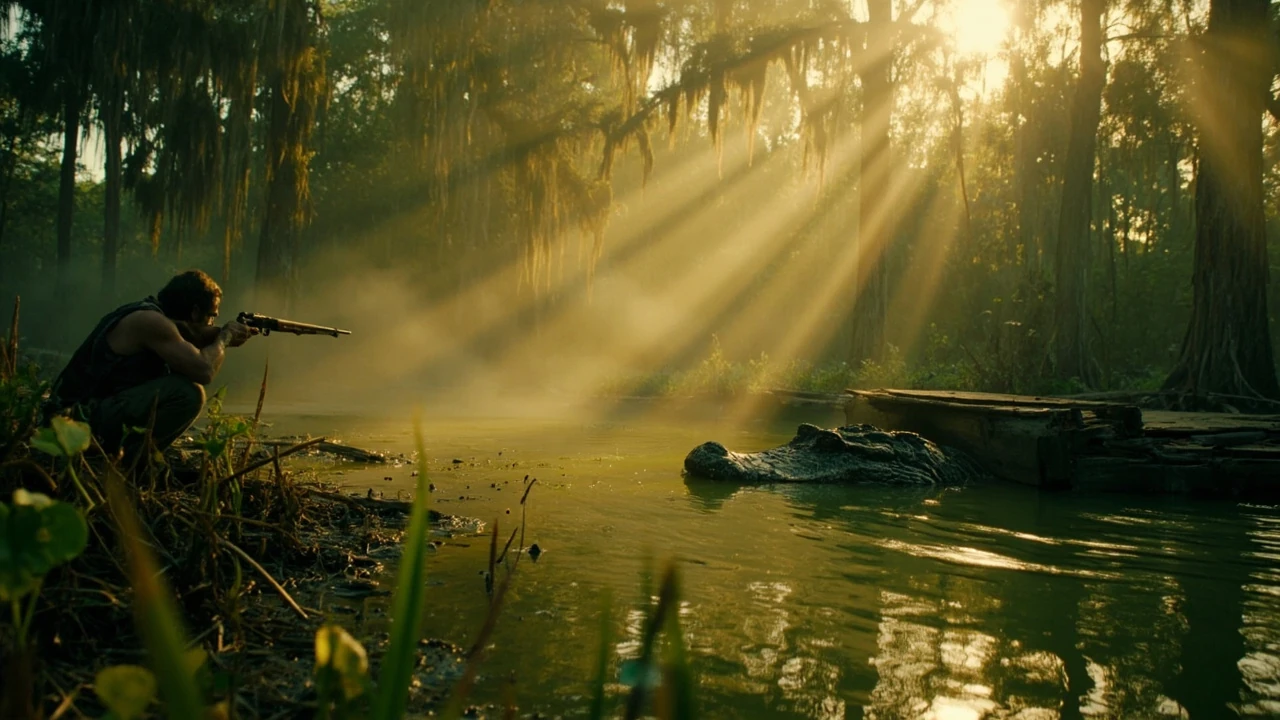
RDR2 legendary alligator: location, requirements, and what the hunt gives you
The RDR2 legendary alligator is one of the harder legendary animals to bring down because it lives in hostile terrain, hits hard, and demands specific preparation. The animal in question is the Bull Gator, found in the Bayou Nwa and around Lagras in Chapter 3 and later. Players usually approach it after they have already cleared a few other legendary hunts, which makes the swamp feel like a deliberate difficulty spike in the game’s pacing. The reward is a legendary alligator pelt and several high-value trinkets and talismans that meaningfully upgrade your camp and your satchel.
This guide focuses on the practical side of the encounter: where the alligator actually spawns, what you need before going in, how the fight behaves, and what the resulting materials are used for. It is written for a player who has already played through the early chapters and wants a reliable plan rather than a general walkthrough of the region. Everything below is based on the live mechanics of Red Dead Redemption 2, with cross-references to the broader open-world design of the game and how Rockstar spaces optional content across the campaign.
Before going further, it helps to know what kind of animal you are actually dealing with. The Bull Gator is a scaled-up variant of the regular alligator that already roams the bayou, but it has a much heavier health pool, a faster charge, and a grab animation that can chain into a death roll if you do not counter it. The encounter is also gated behind a stranger rumor in Lagras, which means it is technically optional even within the optional legendary layer. That mix of accessibility and mechanical weight is why a lot of first-time players either skip it entirely or lose a few attempts to it before they settle into a reliable pattern.
Where the legendary alligator actually lives
The Bull Gator is anchored to a relatively small section of the map in Lemoyne. It does not roam the entire swamp, which means most failed encounters come from looking in the wrong bayou rather than missing a moving target. You can confirm the spawn with a small amount of map reading and by knowing the in-game date and weather, both of which matter more here than they do for most other legendary hunts.
- Region: Bayou Nwa and the water around Lagras, south of Rhodes in Lemoyne.
- Specific spot: A bend in the bayou just east of the Lagras lumber processing area, often marked by a small wooden dock and a sunken barge.
- Biome cues: Cypress knees, hanging moss, deep green water, and frequent fog. The area reads as visually distinct from the rest of Lemoyne.
- Chapter availability: The encounter becomes available in Chapter 3 once you have access to the region. It remains available in every later chapter.
If you arrive and nothing is on the water, do not assume the spawn is bugged. The legendary alligator only appears in its scripted location, so wandering the swamp will not help. The map hint that appears after buying the relevant information from a trapper is the most reliable way to confirm the exact tile. The same hint will also show up as a question-mark icon after the Lagras fisherman conversation, and either path leads to the same body of water.
The bayou’s geography also plays a role in which weapons work and which ones feel awkward. Long sight lines are rare, the tree line is thick, and the only clear firing lane is along the eastern bank. Players who try to fight from the western side usually end up too close to the water and lose the option of a clean retreat, so it is worth spending an extra minute to scout the approach before triggering the encounter. The water itself is also deceptively deep in places; the shallows that look like solid ground often drop off into waist-high mud, which is exactly where a panicked horse tends to bolt when the gator charges.
There is one more detail that catches first-time hunters off guard. The lumber mill at Lagras runs a small ambient event loop with workers carrying logs and dogs wandering the road. If you ride through the mill on your way to the bayou, the dogs can follow you part of the way down the path and end up in the firing line when the Bull Gator surfaces. It is not a scripted interaction, but it is a common reason why an otherwise clean approach turns into a multi-target fight.
How to unlock the encounter
The Bull Gator is not part of the linear mission flow. It sits in the optional layer of the game that is unlocked by talking to the right stranger or by triggering the right ambient rumor. Players often miss the unlock because they pass through the area too early, before the stranger mission is offered, and then return later without the trigger. The unlock is also one of the easier ones to soft-lock if you happen to skip a particular story mission in the same chapter.
- Reach Chapter 3 and gain free travel in Lemoyne.
- Travel to Lagras and look for a stranded fisherman near the docks, usually pacing near a broken boat.
- Speak to him; the dialogue references a large gator that has been killing livestock and people.
- After the conversation, open the map and look for the new question-mark icon south of Lagras, in the bayou.
- Approach the icon slowly. The Bull Gator will surface near the sunken barge.
There is an alternative unlock that some players trigger first: completing a separate legendary animal mission in the area and then returning. The game treats the Bull Gator as its own event, so you do not need a long chain of prerequisites, but you do need to be at least in Chapter 3 with the region unlocked. There is also a small subset of players who trigger the encounter without ever talking to the fisherman at all; in those cases, the question-mark icon simply appears on the map after a few in-game days pass in the Bayou Nwa, and approaching it starts the fight on its own.
If the fisherman is not at his usual spot, the most common cause is a story flag in Lagras that has not yet resolved. The town sits on a side path that can be skipped in Chapter 3, and a few players do skip it. Returning to the main road, playing through the next Rhodes story mission, and then riding back to Lagras usually fixes the issue without any further intervention. A second cause is proximity to a separate stranger encounter; if a bounty hunter or a moonshiner event is active in the same district, the fisherman will not spawn until that event clears, which can take a single in-game day.
It is also worth noting that the fisherman conversation is not a mission in the strict sense. There is no mission marker, no journal entry, and no on-screen prompt to return to him. The only persistent record is the question-mark icon on the map, which can blend in with the half-dozen other ambient icons in the swamp. The reliable way to confirm the unlock is to open the map after the conversation and look for a yellow marker south of the Lagras label; if it is there, the encounter is live.
Loadout and preparation for the swamp
The legendary alligator encounter punishes players who treat it like a plains hunt. The bayou is cramped, visibility is poor, and the animal deals heavy damage. Your loadout should reflect three constraints at once: you need a weapon that can kill a large animal cleanly, you need protection from the swamp’s predator layer, and you need a way to recover if the first attempt goes wrong. The swamp also drains your cores faster than the open plains, so the consumable side of the loadout matters as much as the weapon side.
| Slot | Recommended item | Why it matters |
|---|---|---|
| Primary weapon | Bolt-action rifle or rolling-block rifle with regular or high-velocity ammo | Clean, single-shot damage to a heavily armored large animal at medium range |
| Sidearm | Schofield or Mauser revolver | Backup when the gator closes distance; reliable stopping power |
| Melee | Improved machete or a strong throwing knife | Cutting the gator free if it latches onto you |
| Horse | A calm, swamp-sure horse with high health | The terrain punishes nervous mounts; you may also dismount and fight on foot |
| Consumables | Potent snake oil, cooked big game, and a few health-cure items | Recovery if the gator grabs you or other predators attack during the fight |
| Tonics | Dead eye tonic or a similar Dead Eye booster | The headshot window is small; boosted Dead Eye makes the clean kill realistic |
| Outfit | Medium-weight outer layer with decent cold resistance | The bayou shifts between rain and clear skies; a stable temperature bar keeps your stamina core from draining |
If you are playing in a hostile region and the gator grabs you, the immediate action is to tap the right stick or counter input to push it off, then use the machete before the follow-up bite. The encounter is balanced around players who can manage that mini-game, not around players who try to outheal the damage. The grab also interrupts any active Dead Eye, so popping a tonic right before the grab lands is wasted; the better habit is to use the tonic at the start of the fight and save the health-cure items for after the grab animation finishes.
One loadout detail that often goes overlooked is the coat. The bayou is humid and the weather can shift from clear to stormy in a single in-game day, so a medium-weight outer layer keeps the temperature bar steady. Outfits that lean toward cold-weather gear will drain your stamina core faster than the gator will, which is not a trade most players intend to make. A second detail is the saddle. A high-stamina saddle with a large stamina drain reduction makes a real difference during the dismount and remount cycle, especially if the first shot misses and you need to reposition on foot.
For players who prefer a more aggressive setup, the repeater and shotgun path is technically viable, but the trade-off is real. Repeaters chew through ammo against the gator’s armor, and shotguns force you into the grab range where the death roll is almost guaranteed. The bolt-action rifle sits in the middle: accurate enough for a headshot, slow enough that you will not waste rounds, and common enough that most players already have one in their locker by the time they reach Chapter 3.
Reading the encounter before you shoot
The legendary Bull Gator has a longer tell than most other legendary animals. It surfaces slowly, submerges, and reappears a short distance away. The fight usually unfolds in three phases, and recognizing them prevents wasted ammo and unnecessary damage. This is also where the encounter is a useful case study in how the game uses scripted AI behavior to create tension in an open world, because the timing windows are generous enough to learn but tight enough that ignoring them costs the run.
- Phase 1 – Approach: The gator is partially submerged near the barge. It will not attack immediately. Use this window to position yourself on slightly higher ground and to put a tree or stump between you and the water.
- Phase 2 – Charge: After the first hit or after a set trigger, the gator charges. The hitbox for the charge is narrow, so sidestepping or moving laterally is more effective than backing up.
- Phase 3 – Death roll: When low on health, the gator performs a grab animation. Mash the escape input and switch to the machete if the grab lands. Do not try to fire through the grab; the accuracy penalty makes it almost useless.
A common mistake is to fire as soon as the gator surfaces. The opening head is small and partially underwater, and the early shots often miss or only wound. Waiting for the second or third surfacing, when the gator is fully on the surface and turning toward you, is the reliable way to land a clean killing shot. If you are not confident with the timing, fall back to body shots with the rifle and finish with a point-blank revolver shot to the head. The body-shot path is slower but safer, and it still preserves the legendary status of the pelt as long as the killing blow is clean.
The bayou also has a habit of pulling in other predators while the fight is in progress. Snakes spawn in the reeds, and small gators patrol the shallows near the sunken barge. A second predator interrupting the death roll is the most common cause of an unexpected death, so it is worth spending the first few seconds of the encounter clearing a small perimeter around the firing line. Throwing a piece of meat toward the reeds a few seconds before the fight starts is a cheap way to pull some of the smaller predators off the path without spending a Dead Eye cycle on them.
There is also a sound cue that experienced hunters learn to listen for. The Bull Gator’s splash when it submerges has a slightly different audio mix than the regular alligators in the swamp, with a deeper low-end thump that is easier to hear in headphones than on TV speakers. Once you learn the cue, you can predict where the gator is about to resurface based on the splash direction, which gives you an extra half-second to swing the rifle toward the new position.
Step-by-step hunt plan
The plan below assumes a standard save state, no exploits, and a player who has not used a guide to manipulate spawn conditions. Follow it in order and you should be able to complete the encounter on a single attempt. The plan is also written to be replayable: every step is something a player can repeat on a second run without needing to reset the save or change their outfit.
- Save the game at the nearest camp or at a roadside location before approaching the bayou.
- Fast travel or ride to Lagras. Dismount outside town to avoid spooking the gator or triggering unrelated events.
- Walk or slowly ride to the marker south of Lagras. Stay on the path rather than cutting through deep water.
- When you reach the marker, dismount and crouch. Equip the bolt-action rifle and a Dead Eye booster.
- Wait for the gator to surface twice. On the third surfacing, activate Dead Eye and target the head.
- Fire one shot. If it is a clean headshot, the gator will collapse near the waterline. If it is a body shot, expect a second surfacing and a charge.
- After the kill, skin the animal immediately. The legendary alligator pelt is the most important item and it must be carried off the map before the body despawns.
- Stow the pelt on the horse, then ride to the nearest trapper to unlock the recipes. Donate the legendary flank to Pearson on the way back to camp.
Skinning happens automatically when you stand over the corpse and hold the prompted button. The legendary pelt will be added to your inventory, and the corpse will remain on the ground for a short window. If you leave the area, you can usually return to find the body, but it is faster to skin in place and then load the pelt onto your horse. The skinning animation also leaves you briefly stationary, which is one of the reasons the early-skin habit is risky if there are still small predators in the reeds; clear the perimeter before the kill, not after.
If the body does despawn because you were forced to retreat, the legendary status of the pelt is not lost. The gator is a fixed spawn, and the pelt will simply be available on the next attempt. The cost of a despawn is mostly the time spent reloading the swamp and the consumables burned during the failed attempt, which is why the pre-fight save is worth more than it looks. A second cost is morale at camp; if you die during the run, the gang will briefly lose a few morale points when you respawn, which can compound if you are also running other long hunts in the same chapter.
For players who want a tighter time budget, the entire sequence from dismount to skin can be done in under three minutes on a clean run, with most of that time spent walking the path from Lagras to the bayou. The fight itself usually resolves in under a minute once you learn the surfacing rhythm, and the skin animation is fixed at around ten seconds. The slow part is almost always the approach, which is why the dismount-outside-town habit pays off more than it seems.
What the legendary alligator pelt is actually used for
The pelt is not a generic high-value material. It gates a small set of specific items at the trapper and at the fence, and it is the required material for the Legend of the East satchel upgrade path. The table below summarizes the crafting options that depend on this pelt, along with the secondary materials that each recipe asks for. Most of the secondary materials are common enough to gather on the way back from the bayou, which keeps the overall grind short.
| Crafter | Item | Other materials | Practical use |
|---|---|---|---|
| Trapper | Legendary Alligator Vest | Legendary alligator pelt only | Cold-weather outfit layer; required for the Master Hunter challenges |
| Trapper | Legendary Alligator Gambler’s Hat | Legendary alligator pelt only | Style item with a minor resistance bonus |
| Trapper | Legendary Alligator Half Chaps | Legendary alligator pelt only | Boots-tier outfit layer with a small damage reduction effect |
| Fence | Legendary Alligator Tooth | Legendary alligator pelt | Crafting component for the Legendary Alligator Buckle and certain trinkets |
| Camp upgrade | Legendary Alligator Flank | Legendary alligator pelt | High-value donation to Pearson’s stew pot; boosts camp morale when cooked |
| Trapper | Legendary Alligator Coat | Legendary alligator pelt and a perfect elk hide | Mid-tier cold-weather coat that counts toward the Master Hunter 9 outfit set |
The trapper items are the main reason most players go after this animal. The vest in particular is a strong general-purpose outfit layer because it works well in both hot and cold weather, which makes it a sensible upgrade for players who do not want to swap outfits every time they cross a biome. The half chaps are also worth picking up early because they have a small but real damage reduction effect that stacks with other boots-tier items, and they do not require any additional pelts beyond the Bull Gator.
The trinket side of the reward is easy to underrate. The Legendary Alligator Tooth feeds into the trinket tree, and a few of those trinkets are quietly among the most efficient passive bonuses in the game, especially for low-health or low-stamina builds. If you are already deep into the trapper’s catalogue, the Bull Gator hunt is one of the cheaper ways to round out that part of your loadout. The tooth in particular pairs well with the Legendary Ram and Legendary Wolf trinkets, which together cover most of the survival passive effects that the game asks you to build toward.
For players who care about the Master Hunter challenges, the vest and the coat are both hard requirements, and the half chaps count toward the boots-tier leg slot of the challenge 9 outfit set. That means the Bull Gator pelt is not just a single reward; it unlocks a small chain of recipes that gate the rest of the Master Hunter grind. Skipping the hunt to chase a different legendary first is technically possible, but it will cost you a return trip to the bayou later when the Master Hunter challenges force your hand.
Common failure modes and how to avoid them
Most failed Bull Gator runs fall into a small number of patterns. Recognising them before the fight is faster than learning them through repeated deaths. The list below is ordered from the most common cause to the least common, with a short note on how to recover from each one if you have already triggered it.
- Firing too early: The first surfacing often happens with the gator’s head low. Wait for a higher angle or for the gator to face you.
- Standing in deep water: If you are in water, the gator’s charge hits harder and you cannot sidestep as easily. Always fight from the bank or a shallow shelf.
- Letting the horse die: A panicked horse can run into deeper water and ruin the angle. Dismount before the fight starts.
- Forgetting the Dead Eye boost: Without it, the headshot window is small. A Dead Eye tonic is the single most useful consumable for this encounter.
- Skipping the skin: Leaving the area before skinning the gator can despawn the body. Skin in place, then travel.
- Triggering the fisherman at the wrong time: If the Lagras stranger event is interrupted by a bounty hunter, the question-mark icon can despawn. Fast travel to another region and back to reset the encounter.
If you die during the encounter, the gator respawns on the next reload. There is no permanent failure state for this event, so the cost of a bad run is mostly time and consumables. Save before the fight, and treat the first attempt as a rehearsal if you are still learning the timing. The respawn window is also short; in most cases the gator returns within a single in-game day, which means a failed morning run can be retried in the afternoon without any extra setup.
One failure mode that does not show up in the kill feed is the scripted ambush. If you are tracking the fisherman rumor and you wander into the bayou before the conversation, a regular gator can charge from the reeds and drag the encounter into a fight you were not ready for. Treating the unlock as a hard requirement, rather than a soft suggestion, removes that risk. A related failure mode is the bounty hunter event that occasionally spawns in Lagras; if the bounty hunter chases you into the bayou, the resulting firefight can spook the Bull Gator and force a despawn, which is another reason to clear Lagras before approaching the marker.
There is also a quieter failure mode that only shows up on replays. If you have already completed the encounter once and you return to the bayou for a second run, the gator will respawn in the same spot, but the surrounding ambient animals are noticeably more aggressive. The swamp’s regular predator density scales with the number of legendary animals you have killed in the region, which means a second or third run is usually harder than the first one even though the Bull Gator itself behaves the same way.
How the legendary alligator fits into the wider game loop
For additional context, Red Dead Redemption 2 uses legendary animals as a way to mark meaningful moments in the open world without breaking its pacing. The alligator hunt in particular is a midpoint difficulty spike. It comes after the early-game legendary predators and before the more dangerous predators that appear later in the story. By the time you reach the Bull Gator, the game expects you to understand the basic loop of preparing, tracking, and skinning. The bayou environment then layers on a new constraint: the encounter is harder not because the animal is faster, but because the terrain is.
That design choice has a knock-on effect on the crafting system. Legendary alligator items sit in the mid-tier of the trapper’s catalogue, which means the pelt is a useful but not essential upgrade. You can complete the main story without ever hunting the Bull Gator, but you cannot complete the Master Hunter challenges without it. The game is balancing the reward against the cost of the encounter, and the pelt is the currency that bridges those two systems. The same logic applies to the trinket tree: the alligator tooth is one of the cheaper inputs, but the trinkets it feeds into are among the more efficient passives in the game, so the value scales with how deep you are into the optional layer.
For developers and producers looking at how open-world games pace optional content, the Bull Gator is a good reference point. The encounter has a clear unlock, a clear location, a clear mechanical twist (the bayou), and a clear reward, and it does not depend on the player having read a guide. That combination is what makes the legendary animal layer one of the more reliable systems in the game. It also shows how a single biome can be used to differentiate otherwise similar encounters; the same hunt would feel trivial in the Heartlands, but the swamp’s geometry turns it into a deliberate test of positioning.
It is also worth noting how the encounter interacts with the chapter structure. Chapter 3 is the chapter where the gang settles at Shady Belle and starts taking on more regional work, and the bayou is the southernmost extension of that work. Hunting the Bull Gator is not required to advance the story, but the encounter is one of the few optional activities that pays back in both materials and Master Hunter progress during the same window, which is part of why so many players remember it as a turning point in the open-world loop. The same logic applies in Chapter 4, when the gang relocates to Saint Denis; players who skipped the Bull Gator earlier often feel the gap when they realize the trinket recipes they want are gated behind a pelt they never picked up.
For players who are also playing Red Dead Online, the Bull Gator does not carry over. The online mode uses a different legendary system built around role-specific missions and dynamic events, and the bayou encounter is not part of that loop. The closest analogue is the Trader role’s master hunter missions, which use a different reward structure and a different spawn pattern. That separation is intentional: the single-player legendary system is paced around the campaign, while the online system is paced around the role economy, and the two layers do not share data.
Quality-of-life tips from repeated runs
Players who have run the encounter more than once tend to converge on a small set of habits. None of them are required, but they shorten the hunt and reduce the chance of a wasted attempt. The tips below are the ones that experienced hunters tend to mention most often, with a short note on the trade-off for each one.
- Approach from the east side of the bayou, where the bank is slightly higher and the line of sight to the water is clearer.
- Equip the rifle before dismounting so that you do not waste time cycling through weapons during the first surfacing.
- Use a scoped variant of the bolt-action rifle if you prefer a longer first shot. The extra zoom is helpful when the gator surfaces near the barge.
- Eat cooked big game before the fight so that the Dead Eye core drains more slowly during the headshot.
- Carry two health-cure items. The gator’s grab can leave you at very low health even with a good build.
- Mark the trapper on the map before leaving for the swamp. The post-hunt trip to a vendor is easy to forget in the moment.
If you are playing with a controller and find the headshot timing difficult, lower the aim sensitivity for the duration of the fight. Slower aiming reduces the chance of overshooting the small head hitbox, especially when Dead Eye is active. The same trick works in reverse for the second or third surfacing, when the gator is moving laterally; a slightly higher sensitivity helps you track the head across the screen without losing the target.
Another small habit that pays off is setting a personal waypoint on the trapper before you leave for the swamp. The post-hunt trip back to a crafting vendor is a natural stopping point, and it is easy to forget that the legendary alligator pelt has to be delivered in person for the trapper recipes to unlock. Marking the trapper in advance turns the run from a hunt into a clean two-step: bayou, then vendor. The same trick works for the fence in Saint Denis, which is where the tooth has to go if you want the buckle.
For players who want to push the time budget further, the cleanest pre-fight setup is to fast travel to the bayou from a campfire just outside Lagras, rather than from Shady Belle or Horseshoe Overlook. The shorter ride means fewer random encounters on the way in, and the campfire also serves as a reliable save point if the first attempt goes wrong. It is a small optimization, but it stacks across multiple runs if you are also grinding the surrounding legendary animals in the same session.
Trapper and fence workflow after the kill
The fastest way to convert the legendary alligator pelt into usable gear is to ride directly to the nearest trapper after skinning the animal. There is no menu interaction required; the pelt has to be in your inventory when you speak to the trapper, and the relevant recipes light up automatically. The nearest trapper to Lagras is the one operating out of the small wooden cabin south of the Bayou Nwa road, and the next-closest option is the trapper in the northern part of the Heartlands. Either vendor will accept the pelt, but the Bayou Nwa trapper is the one most players use because it sits on the natural return path.
The fence plays a smaller but still important role. The Legendary Alligator Tooth is a fence-only item, and it is the input for the Legendary Alligator Buckle. Most players pick up the tooth while they are in the area, then craft the buckle on the next pass through Saint Denis or Rhodes. The buckle itself is a small stat bump, but it is also a prerequisite for one of the trinket upgrade paths, so it has more downstream value than its sale price suggests. The fence in Emerald Station is also an option, but the Saint Denis fence has a more complete catalogue and is the one most crafting guides reference.
If you are running the encounter as part of a longer Master Hunter grind, the cleanest order is: skin the gator, ride to the trapper, donate the legendary flank to Pearson’s stew pot on the way back to camp, and then return to the swamp for the next legendary animal. That sequence keeps your satchel upgrades moving, your camp morale stable, and your consumable burn rate low. It also keeps the trapper and fence visits batched, which matters once you start running three or four legendary hunts in the same chapter.
One workflow detail that often gets missed is the camp stew. Pearson’s stew pot only accepts a handful of high-value meats before it caps, and the legendary flank is one of the inputs that fills that cap quickly. If you donate the flank too early in the chapter, you may find yourself short on a stew slot later when you are trying to keep morale stable. The reliable habit is to donate the flank only when camp morale is below a comfortable threshold, and to save the rarer meats for the harder chapters where morale is harder to maintain.
Frequently asked questions
What level is the RDR2 legendary alligator?
The Bull Gator is a fixed-level encounter, not a scaled one. It does not change with your own XP or with the chapter you are in. What does change is the relative difficulty, because your own weapons and Dead Eye improve as the game progresses. If the fight feels too hard in Chapter 3, returning in Chapter 4 or 5 with a better rifle and more Dead Eye tonics is a reasonable approach.
Can the legendary alligator be hunted early in Chapter 1 or 2?
No. The encounter is locked behind Chapter 3 and the Bayou Nwa region. Even with map manipulation, the trigger conversation in Lagras will not appear until the story has progressed far enough for that area to be fully open. Trying to reach the bayou earlier usually results in the swamp being blocked by story logic rather than by a spawn condition.
Does the RDR2 legendary alligator respawn if I fail?
Yes. If you die or fast travel away without skinning the body, the gator respawns on the next reload. There is no per-save cooldown for this animal, but each attempt costs ammunition and consumables, so it is still worth saving before the fight to avoid losing resources.
Is the legendary alligator pelt required for the Master Hunter challenges?
It is required for at least one of the Master Hunter challenges and is the only source of the legendary alligator tooth, which is needed for the Legendary Alligator Buckle. If you plan to complete every Master Hunter challenge and every satchel upgrade, the Bull Gator is a hard requirement, not an optional one.
What is the best weapon for the legendary Bull Gator?
The bolt-action rifle with regular ammo is the most consistent option. The rolling-block rifle works if you are already comfortable with its reload time. Shotguns and repeaters can also kill the gator, but the spread and the rate of fire make it harder to land a clean killing shot, which is what keeps the legendary status on the pelt.
Does weather affect the RDR2 legendary alligator spawn?
Weather changes the difficulty of the encounter more than the spawn itself. Fog and rain reduce visibility and make the first surfacing harder to read, but the gator still appears in the same scripted location. If you want a calmer first attempt, clear weather makes the timing windows easier to see.
Can I complete the legendary alligator hunt on horseback?
You can, but it is not recommended. The bayou has deep water, soft ground, and tight turns, and a horse that is hit by the gator can panic. Most players dismount, fight on foot, and recall the horse after the skin animation. If you must stay mounted, stay on the firmest bank and keep the horse facing the water.
Does the legendary alligator fight count toward the Master Hunter challenge 6 or 9?
The Bull Gator is one of the legendary animals used to track progress in the Master Hunter challenges. It is not the only legendary animal you need, and the exact counter is shared across all legendary kills. Hunting the Bull Gator counts as one legendary animal toward those goals, but you still need to hunt the others to complete the full set.
What happens if I sell the legendary alligator pelt?
You can sell it, but the sale value is much lower than the value of the items you can craft from it. The pelt is one of the few materials in the game that is worth more as a crafting input than as a direct sale. Most players keep the pelt in the trapper delivery slot and bring other pelts instead.
Is the RDR2 legendary alligator encounter in Red Dead Online?
The Bull Gator is a single-player legendary animal. Red Dead Online uses a different legendary system based on role-specific missions and dynamic events, and the bayou encounter is not part of that loop. If you are playing Online, the closest analogue is the Trader role’s master hunter missions, which use a different reward structure.




Leave a Reply