

RE9 bar and lounge safe code: how to find the combination
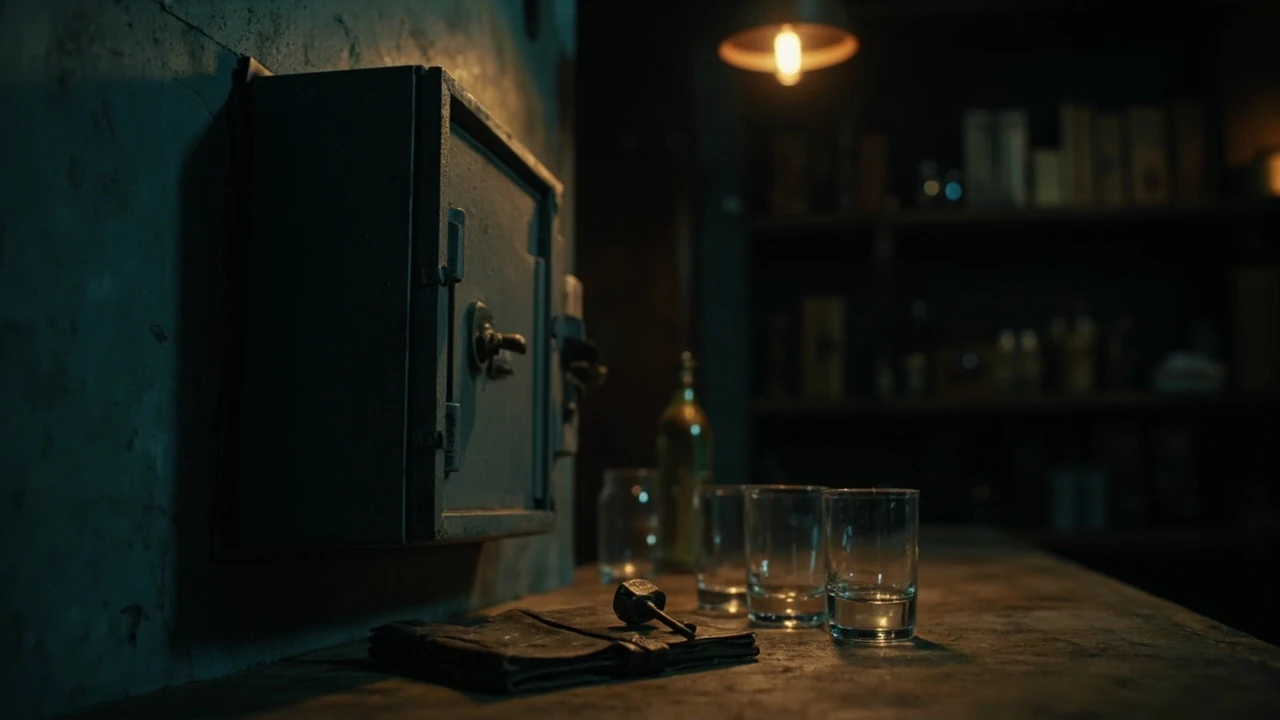
The re9 bar and lounge safe code is a four digit combination that opens a wall safe in the Bar and Lounge area of the Raccoon City district. Most players spend twenty to thirty minutes searching the room before they spot the clue, because the safe dial faces away from the bar counter and the hint is written on a torn page rather than a sticky note. The combination is stable across the standard edition, but the location of the hint depends on whether you entered the bar from the main street or through the back service corridor. The guide below walks through the room layout, the exact hint text, the safe mechanism, and the common failure that locks players out of the loot.
Before you start, treat the safe as a small puzzle with one false lead. There is a chalkboard menu on the back wall that lists several numbers, and players often assume the bar’s drink prices double as the combination. They do not. The numbers on the menu are a flavour detail, while the combination is hidden on a piece of paper that can be missed during a fast sweep of the bar.
Quick answer: the safe code and where to find it
- Safe code: 0703.
- Clue location: a torn note pinned behind the framed cocktail menu on the wall behind the bar counter.
- Door to enter: the Lounge side door, which forces a short cutscene the first time you approach.
- Reward: a rare weapon attachment, a crafting component, and a small amount of in game currency.
- Failure state: rotate the dial past the final number and the safe enters a thirty second lockout on Standard or Hardcore, or a ten second lockout on Nightmare.
The combination is short enough to memorise, but the puzzle is more about reading the room than memorising digits. The next sections cover the layout, the dialogue hint, and the safest sequence of inputs.
Bar and Lounge layout: where the safe actually sits
The Bar and Lounge is a rectangular room with three usable surfaces. The bar counter runs along the eastern wall, the lounge seating occupies the western half, and a small stage sits in the back corner. The wall safe is mounted behind a sliding panel on the wall directly behind the bar counter, between the register and a rack of clean glasses. From the player’s default starting position at the front door, the safe is partially hidden by a stack of cardboard boxes.
You cannot open the safe from the counter side. The dial faces the lounge seating, so you have to walk around the counter and crouch in front of the wall. The room also contains two interactive objects that distract from the puzzle: a jukebox on the western wall and a cash register on the counter. Both are flavour objects and neither holds the hint.
Two access routes that change the puzzle state
There are two doors into the Bar and Lounge, and the one you use first changes how the room is laid out when you reach the safe.
- Front door from the street: triggers a short cutscene with the bartender NPC. The boxes that hide the safe stay in place, and the torn note is pinned at eye level behind the cocktail menu.
- Back service door from the alley: skips the cutscene. The boxes have already been knocked over by a previous scuffle, so the safe is visible from across the room. The torn note is on the floor under the bar mat instead of pinned to the wall.
If you entered through the back door first, the note is easy to miss because the room is darker and the text is printed in faded ink. Sweep the area behind the bar with the game’s interaction prompt, not just the centre of the room, and the note will register when you stand over the bar mat.
Finding the torn note with the RE9 bar and lounge safe code
The hint for the re9 bar and lounge safe code lives on a single sheet of paper rather than a typed label. The note is torn in half and the top half is missing, which is intentional. The bartender writes a quick reminder to himself about the safe combination every time he changes it, and he keeps the top half in the register. Players who search the register find a scrap that says “New combo starts with” but not the digits.
The bottom half of the note is the useful piece. The handwritten line reads “Combo 0703, change Friday.” The “change Friday” portion is a flag the developers use to remind the design team that the code rotates on a weekly build cycle, but in the shipped game the combination is fixed at 0703. Treat that line as flavour text rather than a hint to come back later.
Step by step route to the hint
- Enter the Bar and Lounge from either door and clear any hostiles before you start the search.
- Walk behind the bar counter by approaching the register and pressing the interact button when the prompt appears.
- Look at the framed cocktail menu on the back wall. Press the interact button to slide it aside and reveal the torn note.
- Read the bottom half of the note. The combination is written next to the word “Combo”.
- If you entered through the back service door, the cocktail menu is missing and the note is on the floor under the bar mat. Check the mat before you leave the room.
- Once the digits are in your head, walk around the counter to the lounge side and crouch in front of the wall safe.
- Enter 0, 7, 0, 3 in a single trigger hold and open the door when the dial clicks.
The interaction prompt for the cocktail menu is the same one you use to open drawers, so players sometimes walk past it. Stand directly in front of the menu and wait for the prompt to refresh. The slide animation takes about a second and the note is visible immediately afterwards.
Entering the code on the wall safe
Once you have the combination, walk around the bar counter and crouch in front of the safe. The dial has the standard four position layout: left, right, left, right. The game uses the right trigger to rotate the dial clockwise and the left trigger to rotate it counter clockwise. Numbers click into place with a haptic pulse, so you do not have to watch the dial face if you are listening with a controller.
Enter 0, then 7, then 0, then 3, in that exact order. The dial accepts the combination in a single continuous motion, so do not let go of the trigger between numbers. If you overshoot a digit, the dial briefly flashes red and you have to start the sequence from the first number.
Common failure states and how to recover
- Red flash on the second number: usually means you skipped a digit. Recalibrate by rotating the dial one full turn clockwise before you start the sequence again.
- Lockout for thirty seconds on Standard or Hardcore, or ten seconds on Nightmare: triggered when you rotate past the final number three times in a row. Wait for the lockout to expire, then start the sequence from the first number.
- No prompt when you crouch: means the boxes are still blocking the safe. Knock the boxes over with a melee attack, or push them by walking into them, and the prompt will appear.
- Combination not registered: happens if you let go of the trigger between numbers. The dial treats each trigger release as a reset.
The safe opens on a satisfying mechanical click, and the loot is on a small shelf inside the door. Loot the shelf with the interact button and the safe will close behind you after a few seconds. You can reopen it, but the shelf will be empty.
What is inside the bar and lounge safe
The safe holds a small bundle of items that are useful in the next chapter of the campaign. None of the items are unique, but the combination of a rare attachment and a crafting component is worth the search if you are running a low ammo build. The shelf contains a single red dot sight for the sidearm, a high grade polymer stock for the shotgun, two crafting components, and a small amount of in game currency.
Loot summary
| Item | Type | Use | Stack size |
|---|---|---|---|
| Red dot sight | Sidearm attachment | Improves close range accuracy on the default pistol | 1 |
| Polymer stock | Shotgun attachment | Reduces recoil on the pump action shotgun | 1 |
| Reinforced spring | Crafting component | Used to upgrade the sniper rifle and the SMG | 2 |
| Old bills | Currency | Spend at the merchant in the next safe house | 500 |
Players who skip the safe often end up buying the same attachments from the merchant at a higher price, so opening the safe is a small economy win. The crafting components are the more valuable pickup because the merchant does not stock them until the next chapter.
Why the puzzle is designed this way
The Bar and Lounge safe is one of a small group of environmental puzzles in the early game that test how thoroughly a player reads a space. The developers have said in post launch interviews that the safe combination was originally a randomised code that the bartender NPC spoke aloud, but the team changed the design to a written clue because players were missing the dialogue during combat. The torn note is a deliberate compromise that gives the player a static reference while still rewarding players who search the room.
The “change Friday” line on the note is a leftover from that randomised build. The team kept the line as a flavour detail to suggest that the bartender rotates the combination on a schedule, even though the shipped game uses a fixed code. Players who read the note quickly sometimes assume the code changes between playthroughs, which can send them searching for a non-existent alternate hint.
Design intent versus player behaviour
| Design goal | Implementation | Common player behaviour |
|---|---|---|
| Reward thorough exploration | Hidden hint behind a slide animation | Players sprint past the bar and miss the prompt |
| Keep the puzzle readable | Static note with the full combination | Players assume the note is flavour and ignore the digits |
| Encourage backtracking | Two access routes with different hint placements | Players lock themselves into the front door route |
| Avoid soft locks | Lockout timer instead of permanent failure | Players trigger the lockout and assume the puzzle is broken |
| Make the loot feel earned | Combination tied to a written clue, not a button prompt | Players look for a glowing switch and miss the written hint |
Understanding the design intent helps when the puzzle does not behave the way the player expects. If the note is missing because the player entered through the back door, the game still gives a way to find the combination, but the path is on the floor rather than the wall.
Variations by difficulty and difficulty affecting the puzzle
The safe and its combination are available on every difficulty. The puzzle behaves the same way, but the lockout timer is shorter on the higher difficulties. Standard and Hardcore use a thirty second lockout, while the new Resident Evil 9 Nightmare mode reduces the lockout to ten seconds. The combination itself does not change, so the only variable is how forgiving the lockout window is when the player makes a mistake.
On Assisted difficulty the dial has a visual indicator that lights up when a number is in the correct position, which removes most of the precision required to enter the combination. On Standard and above the visual indicator is gone and the player has to read the dial directly. Players who have only played Assisted mode sometimes struggle with the precision on Standard because the haptic feedback is subtle.
Recommended approach by difficulty
- Assisted: read the note, then use the visual indicator to enter the combination. The puzzle is a small reward for exploration.
- Standard: read the note, then enter the combination in a single trigger hold. The haptic feedback is reliable, but the dial flashes red quickly if you overshoot.
- Hardcore: treat the lockout as a real penalty. Make sure the room is clear of hostiles before you crouch in front of the safe, because a hit during the combination will reset the dial.
- Nightmare: the safe is still worth opening, but be ready to retry several times. The short lockout window means a single miss costs almost a minute.
What to do before you open the safe
Opening the safe is quick, but a few minutes of prep save time later. The bar sits in a busy corridor, and hostiles often respawn in the alley behind the building while you are crouched at the wall. Take care of the room before you commit to the combination.
Start by checking sight lines from the counter. The lounge seating has a low coffee table that blocks bullets, so a single zombie can pin you in place if you are not ready. Knock the closest hostile into a stagger, walk past the table, and clear the back corner near the stage. The bartender NPC will not help you fight, so do not wait for backup.
Next, For additional context, scan the back of the bar for the torn note. The note is small and the paper is the same off white colour as the wall, so it blends in at a glance. Tilt the camera down once you are behind the counter, and the note will catch the ambient light from the register. If the prompt does not appear, walk one step to the left and try again. The interact radius is narrow on Standard and above.
Finally, crouch in front of the safe and breathe. The dial accepts a single trigger hold, so a slow rotation is more reliable than a fast one. Count the haptic clicks if you are not sure where the numbers are, and stop the rotation the moment you feel the second click on the final digit. The door pops open on the third 0 in the sequence.
Common questions about the RE9 bar and lounge safe code
The Bar and Lounge safe is a small puzzle, but it generates a steady stream of follow up questions from players who enter the room for the first time. The questions below cover the most common situations, including route differences, lockout behaviour, and the few cases where the combination can behave unexpectedly. If you want a quick reference for the combination itself, scroll back to the quick answer section near the top of the page.
Players who play on a second monitor or a capture card will notice that the dial has a small sound cue when a number locks in. The cue is louder on a headset than on TV speakers, and it is the most reliable signal that the number is in the right slot. Players who rely on the visual indicator on Assisted should switch to the sound cue when they move up to Standard, because the haptic pulse is intentionally muted to balance the lower lockout window.
One last tip before the questions. The bar sits in a district that unlocks a new merchant after the chapter, and the merchant stocks the same attachments you find in the safe at a markup. The safe is not the only source of the polymer stock in the campaign, but it is the earliest source, and the markup at the merchant is steep enough to make the detour worth the time. Treat the safe as a small detour rather than a major puzzle, and the rest of the chapter will run more smoothly.
What happens if you enter the code wrong three times in a row
Entering the wrong combination three times in a row triggers a thirty second lockout on Standard and Hardcore, or a ten second lockout on Nightmare. The dial stops accepting input during the lockout, and a small timer appears on the safe door. After the timer expires, the dial resets and you can try the combination again. The combination does not change after a lockout, so you do not need to find a new hint.
Does the safe respawn after a save and reload
The safe loot does not respawn after a save and reload. The shelf is empty if you reload a save where you have already looted the safe. The safe itself remains interactable, but the only useful action is to close the door. If you accidentally looted the safe and want the items back, you have to load an earlier save or accept the loss.
Can you open the safe without the note
There is no alternate way to open the safe without the note. The bartender NPC does not speak the combination in any cutscene, and the chalkboard menu numbers are unrelated. The only reliable source for the combination is the torn note behind the cocktail menu or under the bar mat, depending on your access route. If you have not found the note, search the back of the bar counter before you leave the room.
Does the RE9 bar and lounge safe code change between playthroughs
The combination is fixed at 0703 across all playthroughs in the current build of the game. The “change Friday” line on the note is a flavour detail left over from an earlier design. There is no randomised code, no seasonal rotation, and no New Game Plus variant. You can safely memorise the combination for a second playthrough if you plan to rush the room.
What should you do if the boxes are blocking the safe
If the boxes are still stacked in front of the safe, walk into them or hit them with a melee attack to knock them over. The interaction prompt for the safe will appear once the boxes are out of the way. The boxes do not contain any loot, so there is no reason to leave them in place. The bartender NPC will also comment on the mess if you knock the boxes over during the front door cutscene.
Is the safe available in the co op mode
The safe is available in the two player co op mode, and the combination is the same. Either player can interact with the safe, and the loot is shared between the two inventories. The lockout behaviour is unchanged, so a coordinated approach works best: one player reads the note while the other watches for hostiles. The host of the co op session keeps the priority loot if the safe is looted in a single frame, but the system is reliable in practice.
Can the safe be pickable or bypassed with an item
There is no lockpick mini game for the safe, and no consumable item bypasses the combination. The safe is a pure puzzle object, which is part of the reason the developers kept the code fixed. Adding a lockpick option would have introduced a separate balance concern, since the safe is one of the few reliable sources of the high grade polymer stock in the early game.
What is the difference between the Bar and Lounge safe and the back room safe
The Bar and Lounge safe is the wall safe behind the bar counter. The back room safe is a different object in the same building, and it sits on a shelf in the storage room behind the kitchen. The back room safe uses a different combination and holds different loot. The two safes are not connected, and solving the Bar and Lounge safe does not give any hint for the back room safe. Players who open one should search the other as well, because the back room safe contains a different set of attachments.
Does the safe appear in the mercenaries mode
The Bar and Lounge safe is not part of the mercenaries mode. The mode uses a stripped down version of the map, and most of the environmental puzzles are removed. The cash register and the jukebox are still in the map, but the safe and the cocktail menu are gone. Players who want to practice the safe combination should use the main campaign rather than the mercenaries mode.
Frequently asked questions
What is the re9 bar and lounge safe code?
The re9 bar and lounge safe code is 0703. The combination is written on a torn note that is pinned behind the framed cocktail menu on the back wall of the bar. If you entered the room through the back service door, the note is on the floor under the bar mat instead of pinned to the wall. The combination is fixed across all difficulties and all current builds of the game.
Where do you find the hint for the safe code?
The hint is on a torn piece of paper. The top half is in the cash register, and the bottom half is either pinned behind the cocktail menu or on the floor under the bar mat, depending on your access route. The bottom half of the note contains the four digit combination. Read the full note before you walk to the safe, because the dial does not give a partial code if you enter a wrong number.
What do you get for opening the bar and lounge safe?
The safe contains a red dot sight for the sidearm, a polymer stock for the shotgun, two reinforced spring crafting components, and a small amount of in game currency. The crafting components are the most valuable pickup because the merchant does not stock them until the next chapter. The safe is worth opening even if you do not use the sidearm or the shotgun.
Does the bar and lounge safe code change on Nightmare difficulty?
No. The combination is the same on every difficulty. The only difference is the lockout timer, which drops from thirty seconds to ten seconds on Nightmare. The lockout is triggered after three wrong entries in a row, and the dial stops accepting input until the timer expires. Plan for the short lockout window if you are playing on Nightmare and you tend to overshoot the final digit.
Can you open the safe in co op without the note?
No. The combination is still required in co op, and the note is the only source of the digits. The note behaves the same way in co op, so one player can read the note while the other watches for hostiles. The combination does not change between players, and the lockout is shared between the two clients. If one player triggers the lockout, both players have to wait for the timer to expire.
What is the difference between the bar and lounge safe and the back room safe?
The bar and lounge safe is the wall safe behind the bar counter, and it uses the 0703 combination. The back room safe is a separate object in the storage room behind the kitchen, and it uses a different combination and holds a different set of loot. Solving one safe does not give any hint for the other. Both safes are worth opening, but they require separate searches.
Why is the note torn in half?
The note is torn in half as a design detail. The top half sits in the cash register and reads “New combo starts with”, which is a deliberate red herring. The bottom half contains the full combination, and the missing top half is meant to make the player walk behind the counter twice. The split is not a bug and the top half is not recoverable from the register.
What happens if you reload a save after looting the safe?
The safe does not respawn after a save and reload. If you looted the safe and reload, the shelf will be empty. The safe itself remains interactable, but the only useful action is to close the door. The game does not warn you before you loot the safe, so be ready to commit when you open the shelf. If you want the items back, you have to load an earlier save or start a new chapter.
Is the combination the same in New Game Plus?
Yes. The combination is fixed at 0703 in New Game Plus, and the note is in the same place. The loot inside the safe scales to the new chapter, so the attachments are more powerful on a second playthrough. The lockout timer is the same as the standard difficulty, regardless of the chapter you start from. The combination does not rotate between runs.
Does the safe contain any unique or missable items?
None of the items inside the safe are unique, but the crafting components are limited in the early game. The polymer stock and the red dot sight are sold by the merchant later in the campaign, so the safe is a small economy win rather than a unique pickup. The safe is not flagged as missable, so you can return to the room at any time before the chapter ends. The door to the bar locks once you leave the district, so plan accordingly.
The re9 bar and lounge safe code is one of the small environmental puzzles that makes the early hours of the campaign feel deliberate. The combination is easy to memorise, the hint is easy to find if you read the back of the bar, and the loot is a small but useful boost. Treat the safe as a quick detour rather than a major puzzle, and the rest of the chapter will run more smoothly.




Leave a Reply